Setting Up The Project
Create a new git repository in a safe location, this will be where we write the code for our app
Setting up the Meson project
Creating the meson.options file
Create a file called meson.options and copy the following to it:
option('kindle_root_dir', type : 'string', value: '', description: 'The path to the Kindle\'s mounted rootfs (for linking libraries)')
The meson.options file tells Meson what parameters a project uses for configuration and compilation, in our case we only need the kindle_root_dir option so we can set it to our Kindle’s root directory in a later step.
Creating the meson.build file
The meson.build file specifies how our project is configured and compiled.
Create a meson.build file and copy the following to it:
project('example_gtk_application', 'cpp', version: 'v1.0.0', default_options: ['cpp_std=c++17'], meson_version: '>=1.1')

# Define dependencies we want
gtk_dep = dependency('gtk+-2.0')

###
# Project definition
###
sources = files(
    './src/main.cpp'
)

include_dirs = include_directories(
  './src/include/'
)

executable('example_gtk_application', sources, include_directories: include_dirs, dependencies: [gtk_dep], cpp_args: '-static-libstdc++', link_args: '-static-libstdc++')
Note how we statically link the C++ standard library! Koxtoolchain ships with a GCC version newer than the Kindle technically supports, but this is fine so long as we statically link the standard library.
Your overall file structure should now look something like this:
.
├── meson.build
└── meson.options

1 directory, 2 files
Creating our source files
Now create a file called main.cpp and a folder called include under the src/ folder, your overall file structure should look something like:
.
├── meson.build
├── meson.options
└── src
    ├── include
    └── main.cpp

3 directories, 3 files
Now in main.cpp, copy the following code:
#include <gtk-2.0/gtk/gtk.h>

int main(int argc, char* argv[]) {
  GtkWidget *window;

  gtk_init (&argc, &argv);

  window = gtk_window_new(GTK_WINDOW_TOPLEVEL);
  gtk_window_set_title(GTK_WINDOW(window), "L:A_N:application_ID:org.kindlemodding.example-gtk-application_PC:T");

  g_signal_connect(window, "destroy", G_CALLBACK(gtk_main_quit), NULL);

  gtk_widget_show(window);

  gtk_main();

  return 0;
}
Testing compilation
Now we will use meson to make sure we can actually compile our code for both our computer and our target
Configure the Meson project for your computer as so:
meson setup builddir
Now we can try to compile our program
meson compile -C builddir
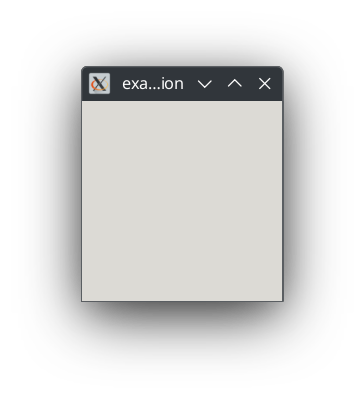
If you run the program on your computer, you should see an empty GTK window:
Testing Cross-Compilation
Now we can compile a version that can run on the Kindle itself:
meson setup --cross-file <meson_crosscompile_path> builddir_<target>
Where your target is the same as before and <meson_crosscompile_path> is substituted from the path the SDK installer gave you earlier.
Once it is finished setting up, you can compile it just as you did before:
meson compile -C builddir_<target>
If all the above steps work, then you have succesfully compiled your first application for the Kindle.